How to Use Google Sheets in Report Toaster
In this article, we take a look at how you can add your Google Account in Report Toaster so you can schedule reports to send to Google Sheets.
What is Google Sheets
Most of you will already be familiar with Google Sheets, but essentially, it's an online spreadsheet for tracking data. Much like Microsoft Excel, it's popular because it's viewable online, meaning it can be shared and used to combine data from different sources (including other apps).
With our recent May 2026 update, you can now schedule Report Toaster reports to send directly to your Google Account.
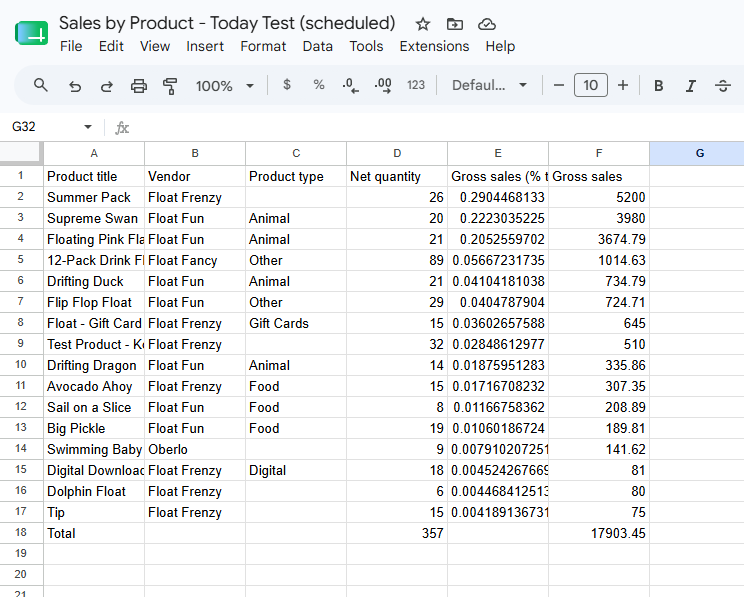
Let's take a look at how this works!

Adding your Google Account.
First, add your Google Account to Report Toaster via these steps:
- In the Report Toaster app, navigate to the Settings menu (left-hand navigation pane), look for the Google Account section, and click the button for Add Google Account

A window will popup to login to your Google Account. Be sure to choose the right account (e.g. if you have a personal and a work account).
Once you've selected the account, Google will then explain the permissions we need for this to work. You can review our Privacy Policy and Terms of Service before clicking Continue.
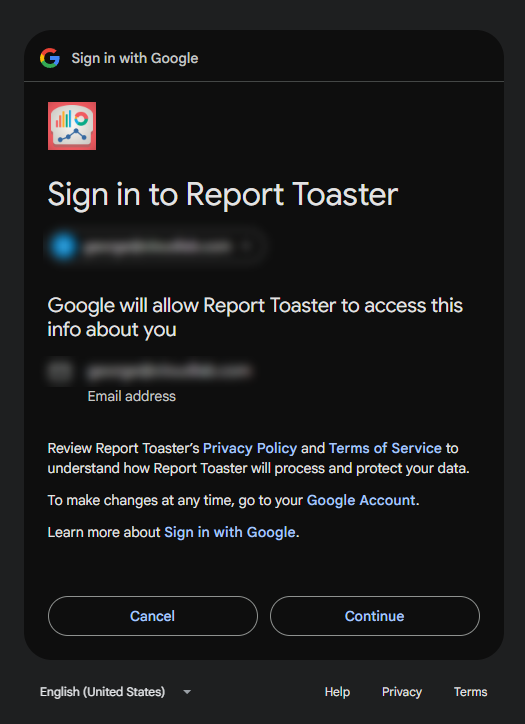
- Next, be sure to click this box (highlighted in red) before clicking Continue again. This is vital to accept permissions; otherwise, the process will fail, you'll see this box in Report Toaster and will need to start over.
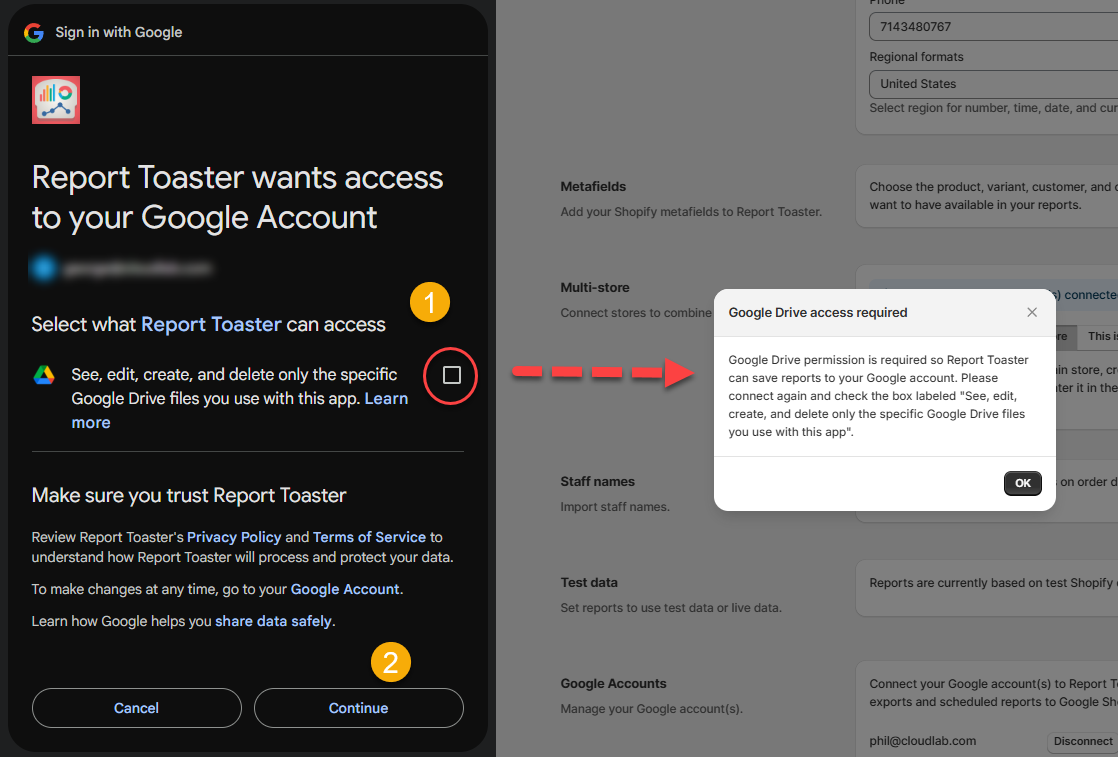
Once successful, your Google Account will appear here.
(click the Disconnect button if you ever need to remove it again).

Setting up the Scheduled Reports Recipient
Now that your account is added, it's time to add your Google Account as a recipient so you can schedule reports to it for regular delivery.
First, navigate to the Scheduled Reports section and click the Recipients tab. Here, you will see any of your existing recipients. Click the Add button to add one for your Google Account
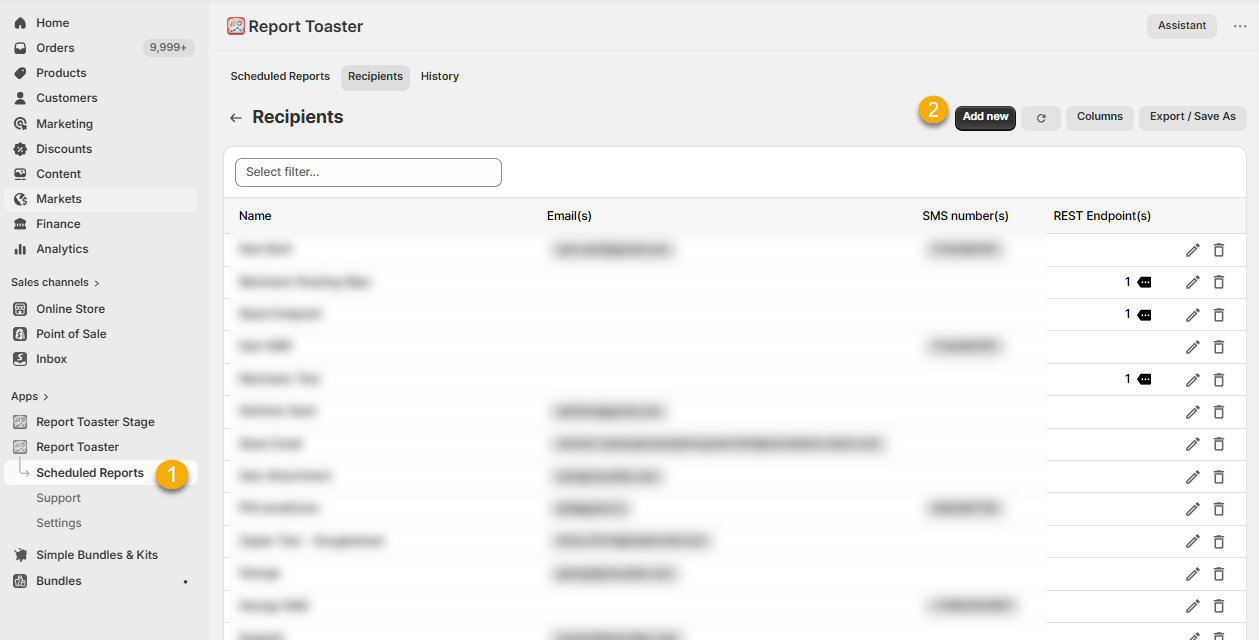
This will open a dialog box. If you choose your Google Account under the Google Sheets account box, the following options will appear:
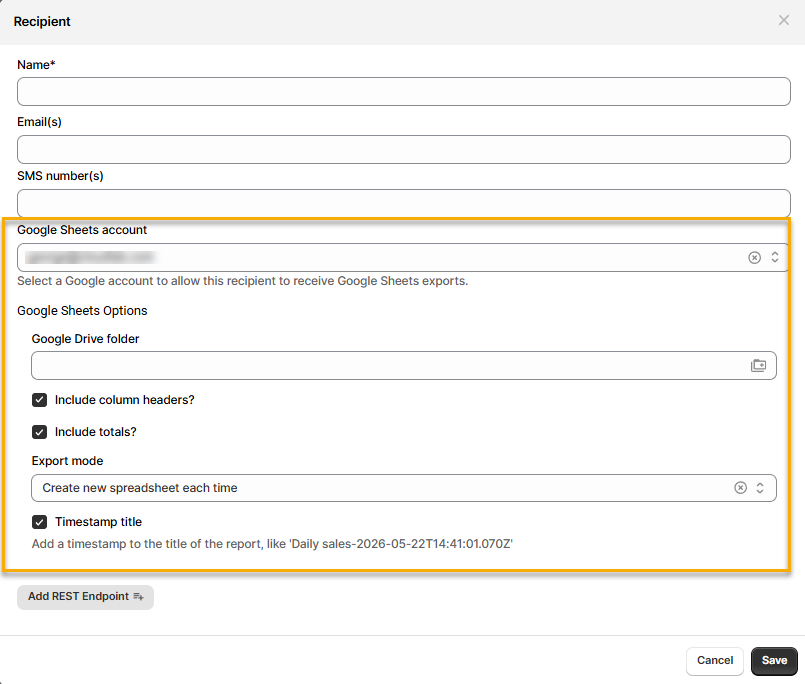
Google Sheets Account: The account you are using for this recipient. Fill in this box and the remaining Google Sheets Options (below) appear:
Google Drive folder. This is the subfolder in your account you want any reports to be sent to. Leave blank to send to just your main folder.
Include column headers. Check this option if you want column headers to appear in the first row of your CSV export (default = yes)
Include totals. Check this option if you want totals to appear in the bottom row of your CSV that total up each column (default = no)
Export mode. Choose between the following
a.) Create new spreadsheet each time. Use this if every time the scheduled report runs, you want a new document created in your Google Drive. This is the default option
b.) Replace spreadsheet each time. Use this if every time the scheduled report runs, it overwrites/replaces the existing file with the new copy.Timestamp file. Check this option if you want a timestamp to be added to the name of the document each time it sends. This is probably a good idea if you will have multiple documents and need to see at a glance which file corresponds with which date.

If different reports have different requirements out of these options above, setup multiple recipients for each of them.
Scheduling the Report
Once your recipient has been setup, you can Schedule a report as normal to send to your Google Account.
When the schedule runs, it sends a CSV to your Google Sheets Account at the appointed time. You can validate this via the History tab as normal:
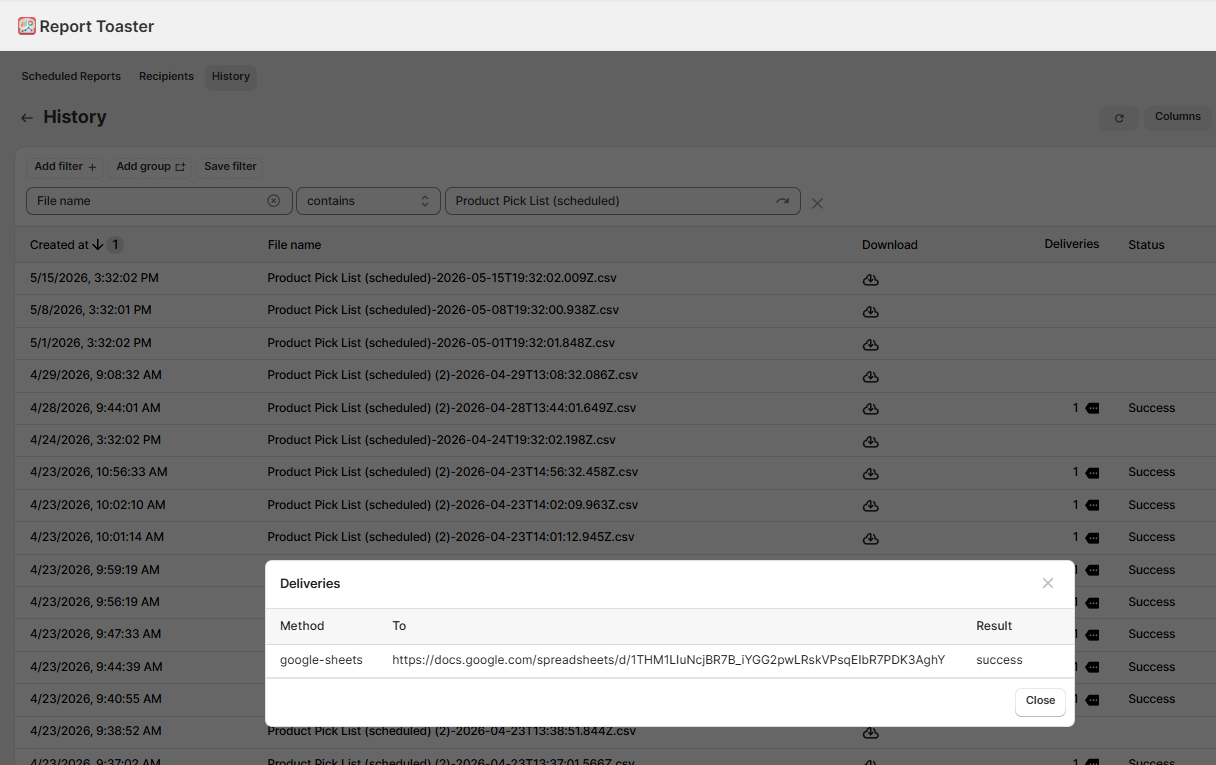
Finally, if you want the Scheduled Report to run only one time (i.e. a single export, rather than regular delivery) then either choose an End Time for the Scheduled Report or simply delete the Scheduled Report after it runs.
And then that's basically it!
If you need help setting up Google Sheets for your account then please contact us at support@cloudlab.com and we'll be happy to help you out.