
How Do I Schedule a Report?
Another entry in our 'Basics' series, this article will cover how to setup a Scheduled Report in Report Toaster.
Video more your thing? Check out the video version of this guide here.
Note - You must be on a paid plan of Report Toaster to have access to this feature. You can check out our app listing for more information on our various plans.
For instance, suppose I was looking to setup a report that automatically gets emailed to me every week to tell me what inventory we have in stock.
Scheduling a Report
Once I've found the report I'm looking for, it's time to schedule the report.
Here we'll use the built-in Inventory Value report and start off by clicking the Schedule button like so:
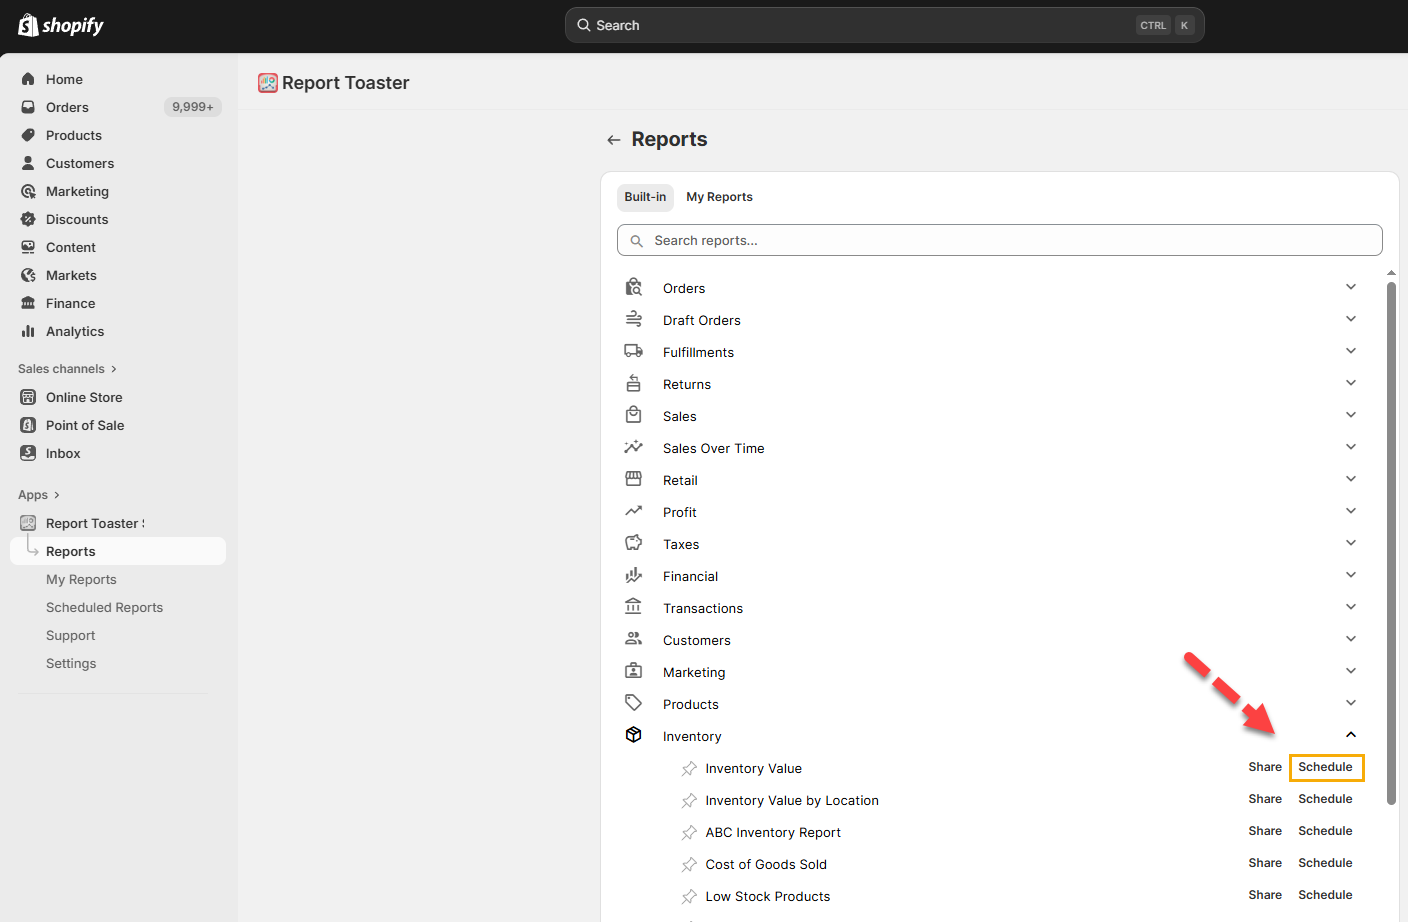
(click image to enlarge)
Note - Generally we recommend saving a report to your My Reports before Scheduling. That way, if you need to make changes to the report later and save the report again, they'll automatically be applied the next time the schedule runs.
This then brings up a window where you can select your various options:

(click image to enlarge)
Lets look at each of these in turn:
Name. What you want the report to be called. This is simply for your internal reference, so when you lookup the report again in the Scheduled Reports section, you'll remember which report is which.
Schedule every. How often you want the report to be delivered (by default, this is set to one week). You can change the number and the interval (hours, days, weeks, or months).
Start at. When you want the report to first run. Here you can select a date and time.
End at. When you want the reports to stop running. Leave this blank if you want the reports to continue indefinitely.
Recipients. If you want the report to have a recipient, you can select it here.
Format. The chosen file format for your report, whether it is CSV, JSON or PDF.
Skip Empty Reports. If a report is blank (has no data), should it skip sending anything?
(CSV Only) Include Headers. If the report is a CSV file, do you want column headers included?
Accounts. If you have multiple stores setup via multi-store, which store(s) do you want the report to run for.
When you're done setting this up, it should look something like this:
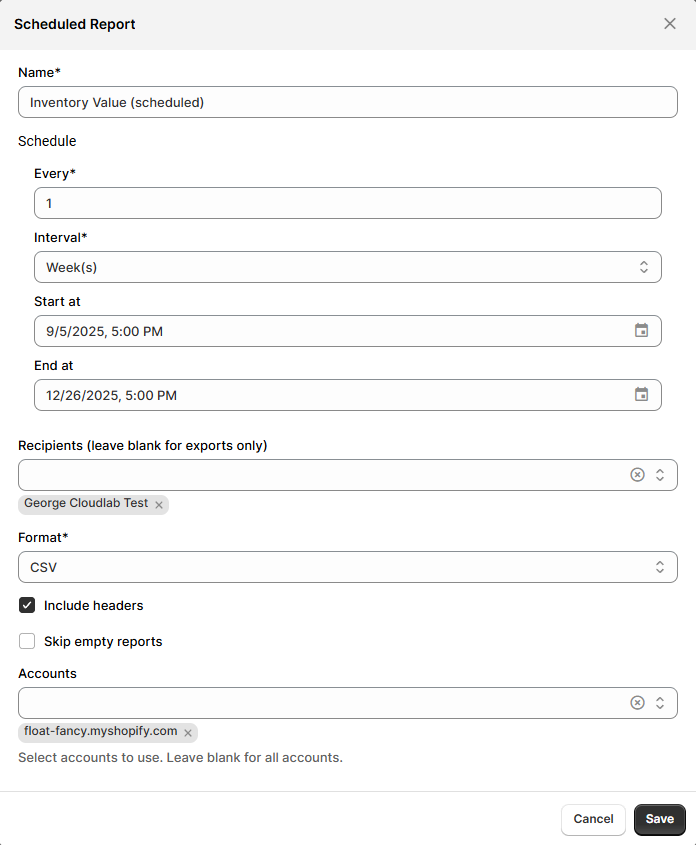
(click image to enlarge)
The Scheduled Report will run off whatever version you have saved to your My Reports (or whatever the default template is, if you're scheduling a standard report). This means that if you make changes to a saved report and save it again with the same name, these changes will be reflected in the Scheduled Report whenever it next runs.
Recipients
As mentioned above, we can choose a Recipient for this report to go to.
Recipients are entirely optional (you can have the system create a report each week and send it to nobody if you just need a regular snapshot of the report for your own use).
Under Recipients, click the dropdown arrow on the right of the window. That pulls up this window:
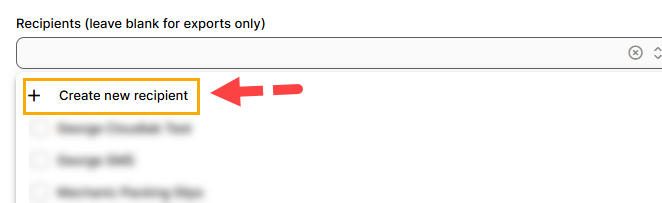
(click image to enlarge)
If we had any pre-existing recipients, they would appear here as an option. But for now, let's create our first recipient by clicking 'Create new recipient'.
(click image to enlarge)
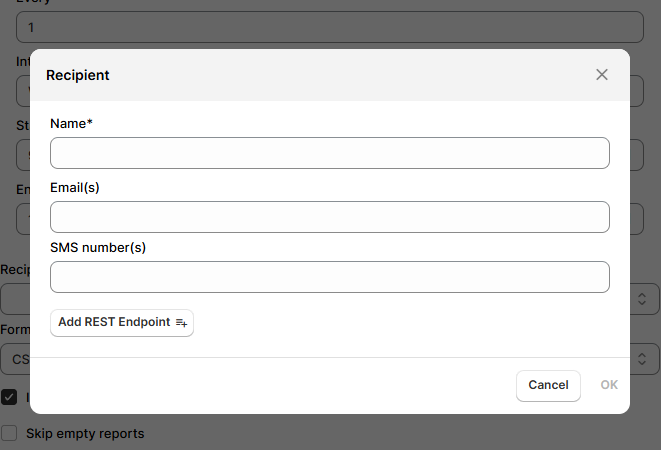
Here we can fill out the following information:
Name. The name of the person who is receiving the report.
Email(s). The email address(s) of the intended recipient.
SMS number(s). The mobile phone number(s) of the intended recipient.
Add Rest Endpoint. The URL Rest Endpoint of the intended recipient.
Note that if you fill out an Email for your recipient, a toggle will appear for Create attachment:
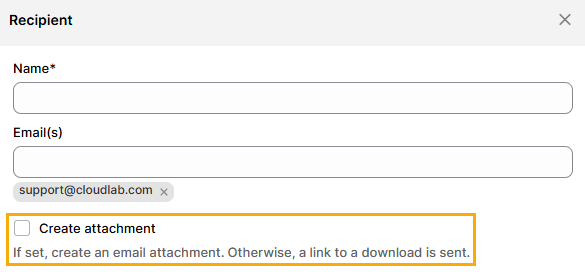
(click image to enlarge)
Turning this toggle on will send your scheduled report as an attachment in the email. Otherwise, it will be available via a clickable link in the body of the email.
Once you're done, click Ok and the recipient should be available for selection.
Checking on a Scheduled Report
If you want to check on the status of a Scheduled Report or make any adjustments, you can go to the Scheduled Report section via the menu like so:
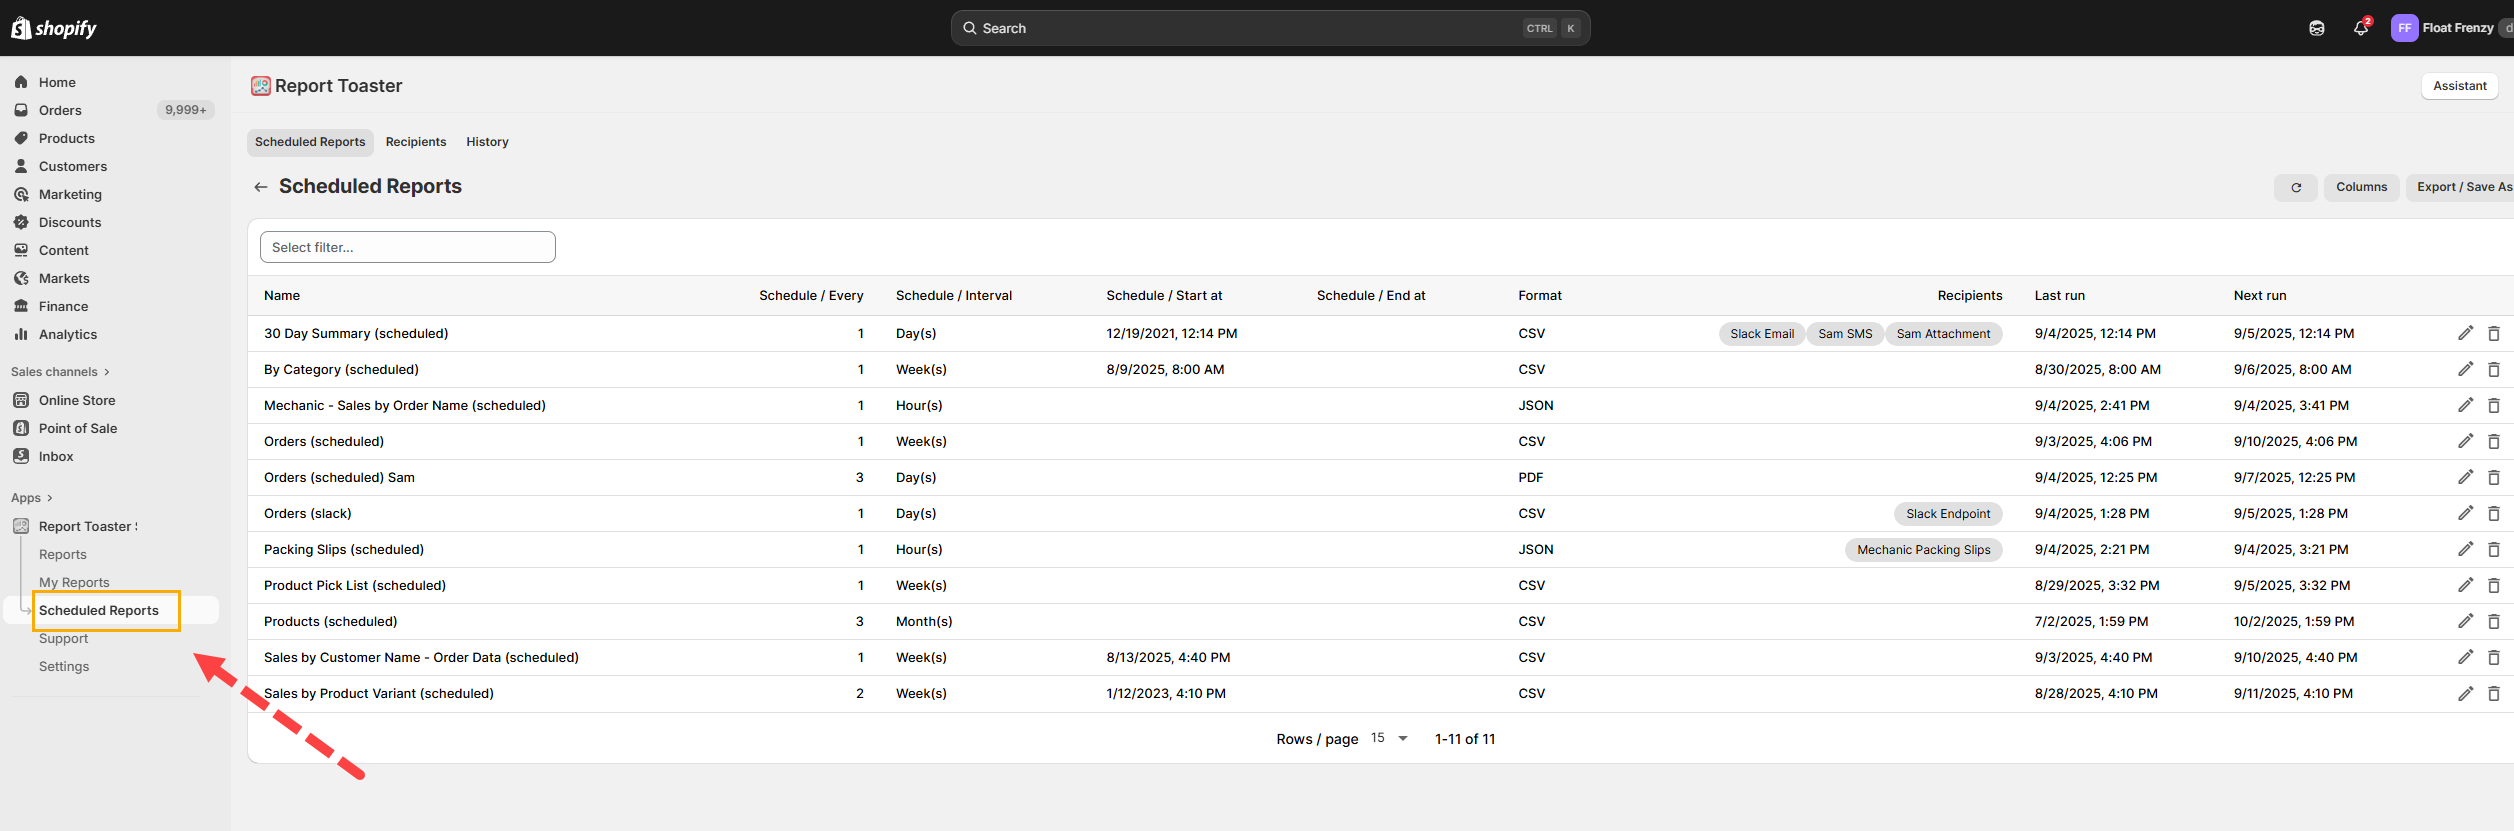
(click image to enlarge)
Here you can see any Scheduled Reports you have previously created.
If you want to make edits to a report, click the pencil icon.
To delete a Scheduled Report, click the trash can icon.
You can add/remove columns by clicking the grid icon.
You can download a list of Scheduled reports using the file icon.
Over in the recipients tab, you can see all existing recipients:
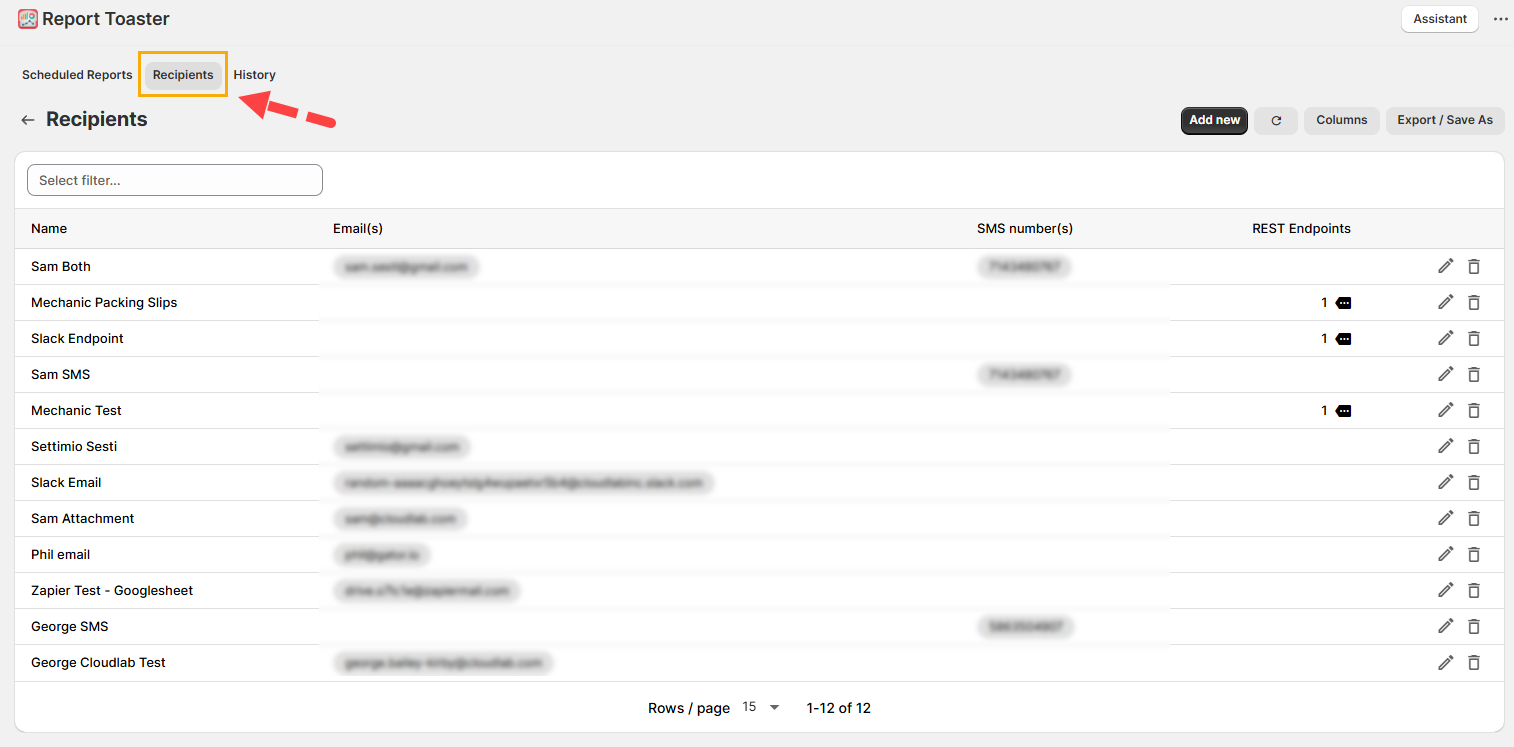
(click image to enlarge)
You can also add a new recipient from this screen by clicking Add new.
Finally, on the History tab, you can see the history of all Scheduled Report activity:
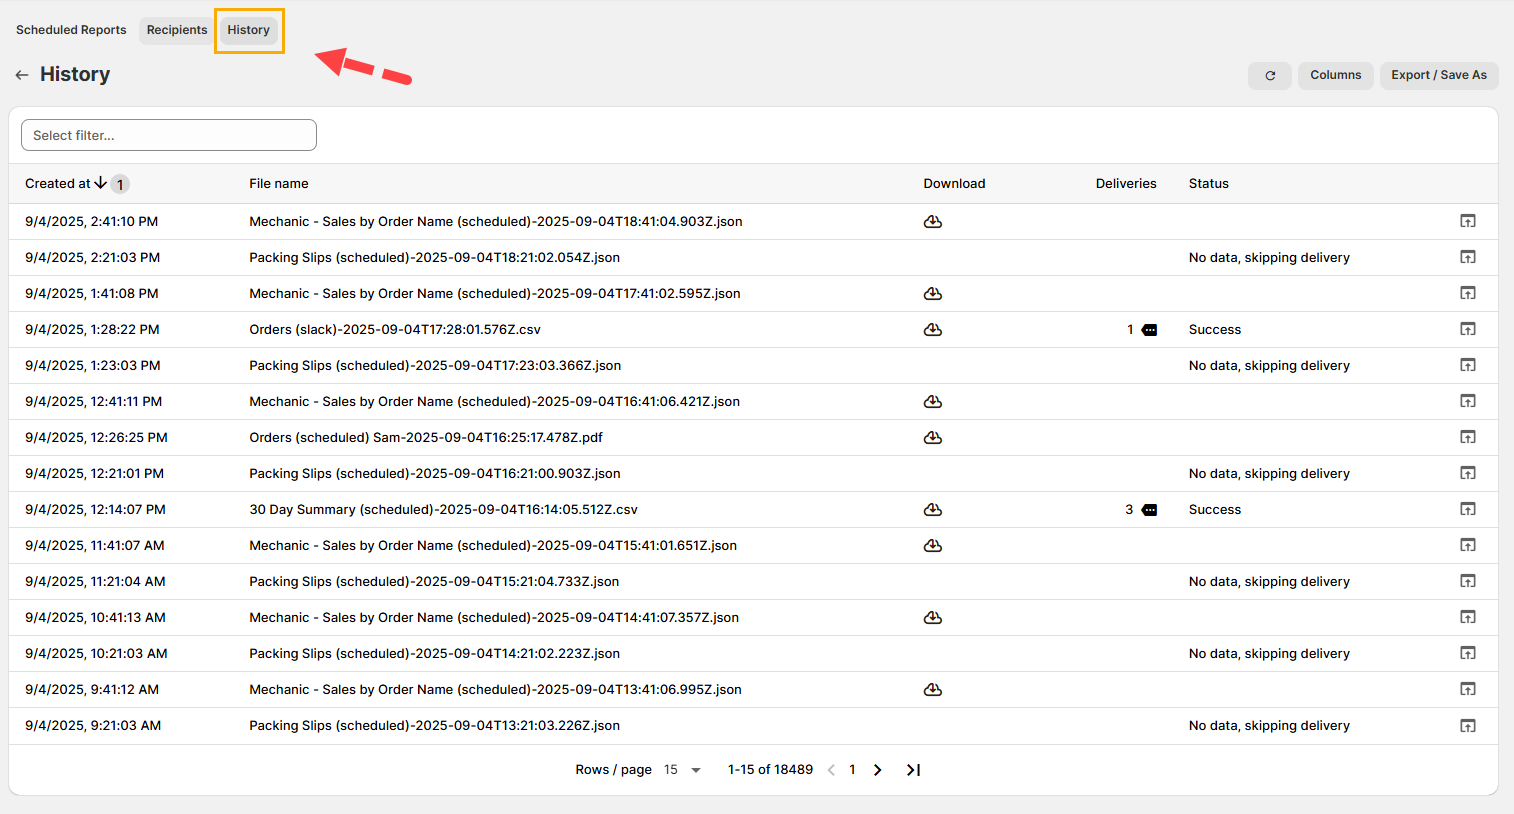
(click image to enlarge)
From this menu, you can see any reports you had previously scheduled, including when they were last sent.
Scheduled Reports are stored in History for up to 1 year. For reports dating earlier than this, we recommend retrieving them from your email (if a recipient was set up) or recreating the report in the app.
Under Download, you can download any of these reports again.
Under Deliveries, you can see the details of any prior deliveries.
Under Status, you can see if the report was successfully sent.
And that's it!
For other articles in our Basic Guides series, check out our main section here.