How Do I Use a Filter on a Report?
Next up in our 'Basics' series, we have how to use a Filter in a Report.
This is perfect for when you have the columns you need, and now you want to narrow down, segment, or otherwise filter the data to a specific view. E.g.
- Show me only Sales to California.
- Show me only Orders containing a certain Product.
- Show me only Transactions involving this Payment Method.
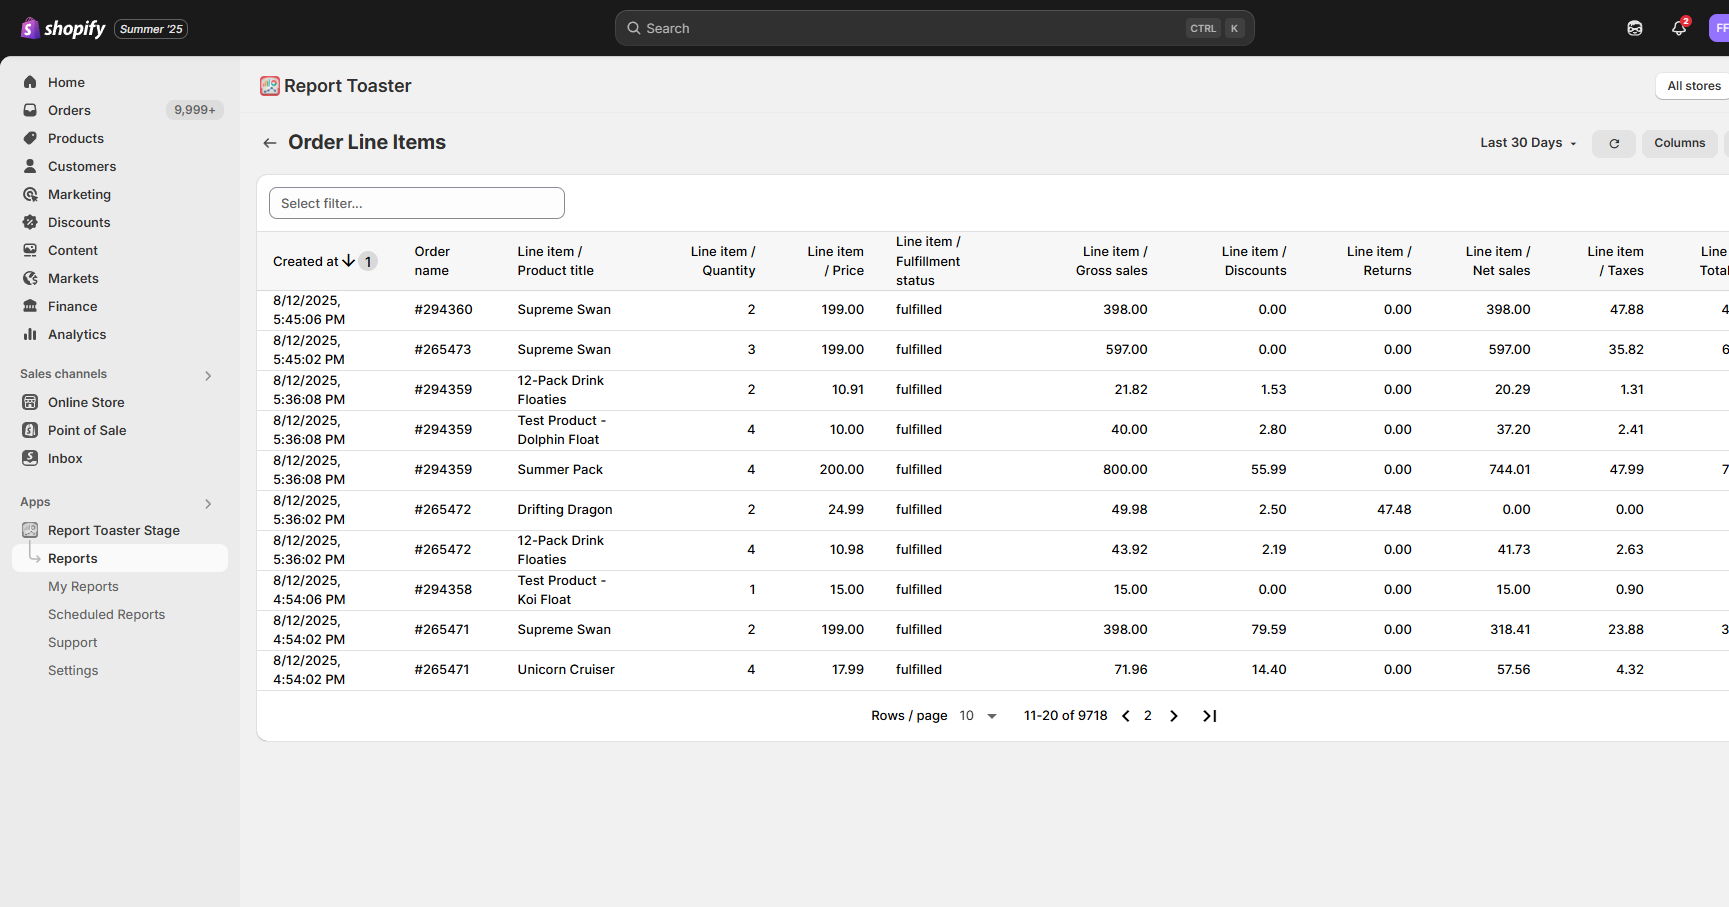
To do this, let's first choose the report I want to filter. In this case, we'll use the Orders - Line Items report.
(click image to enlarge)
Adding a Filter
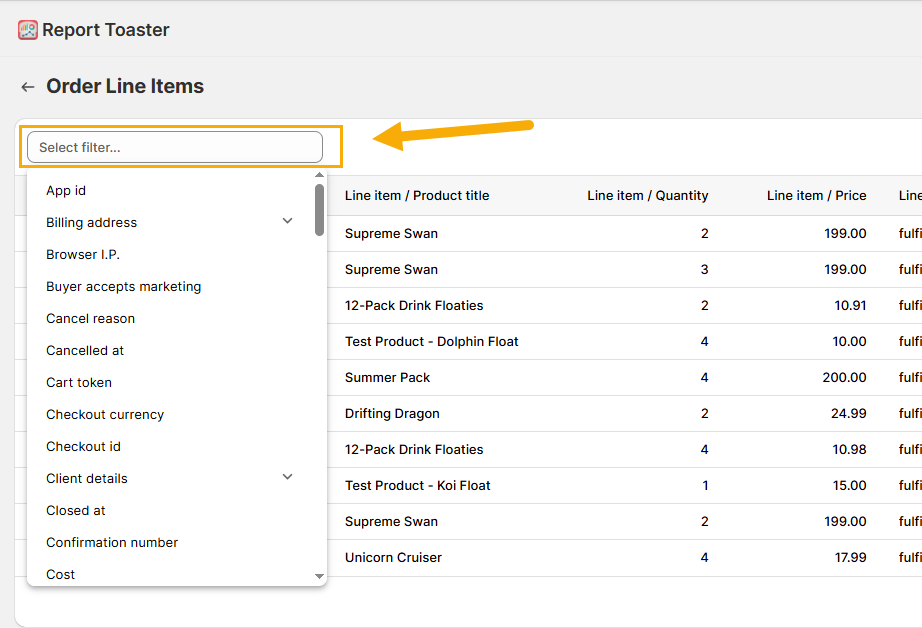
Step 1 - Click on 'Select filter' from the dropdown at the top.
(click image to enlarge)
Step 2 - Type in the field you want to filter on.
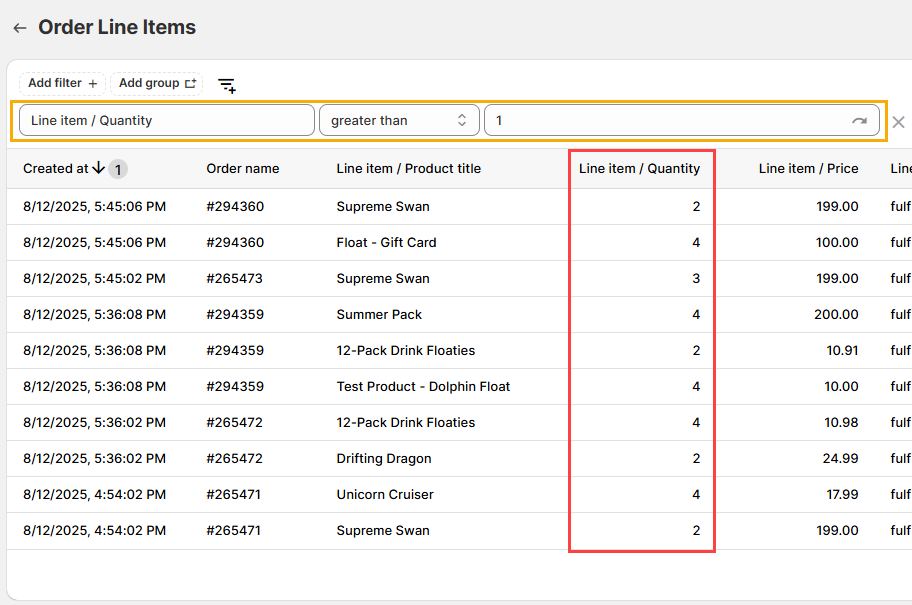
So for example, lets say I wanted to filter this report to only show instances where 2 (or more) of a given product are in an order? I could use a filter like 'Line Item / Quantity', 'greater than' and '1'.
The end result might look like this:
(click image to enlarge)
Notice that no line items appear with a quantity of 1.
This might be useful if I was looking to create a report which shows where multiples of an item have been bought in a single order.
Multiple Filters - AND/OR
So now let's look at something more complex - combining multiple filters together with AND/OR conditions.
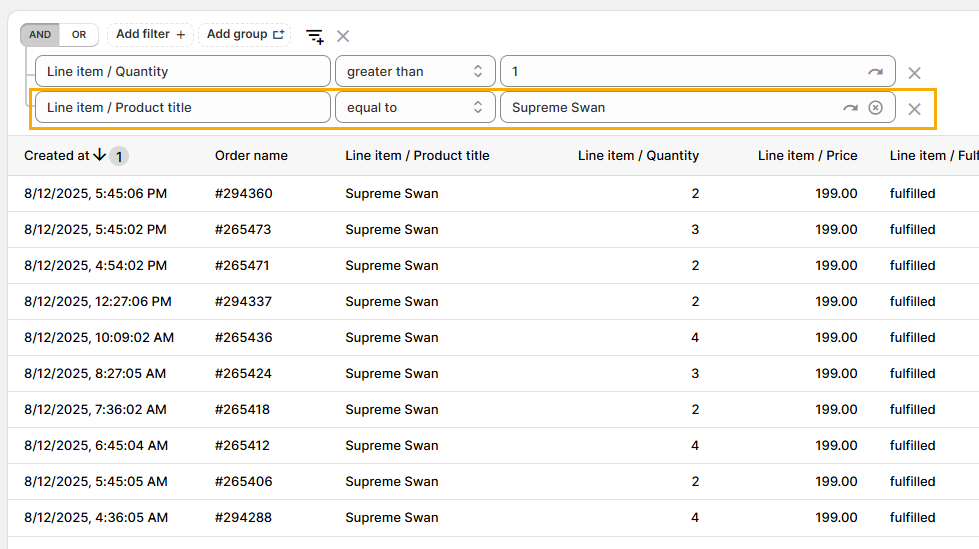
E.g. show me line items with multiple quantities AND the product title has to be the Supreme Swan.
Step 1 - First, I would click Add filter to include an additional filter.
Note - this option only appears when you already have a filter on the report.

(click image to enlarge)
Step 2 - I would type in the 'Line Item / Product title', choose 'equal to', and then type in 'Supreme Swan'.
(click image to enlarge)
Notice that now, the report only shows Orders that have more than one Supreme Swan being ordered.
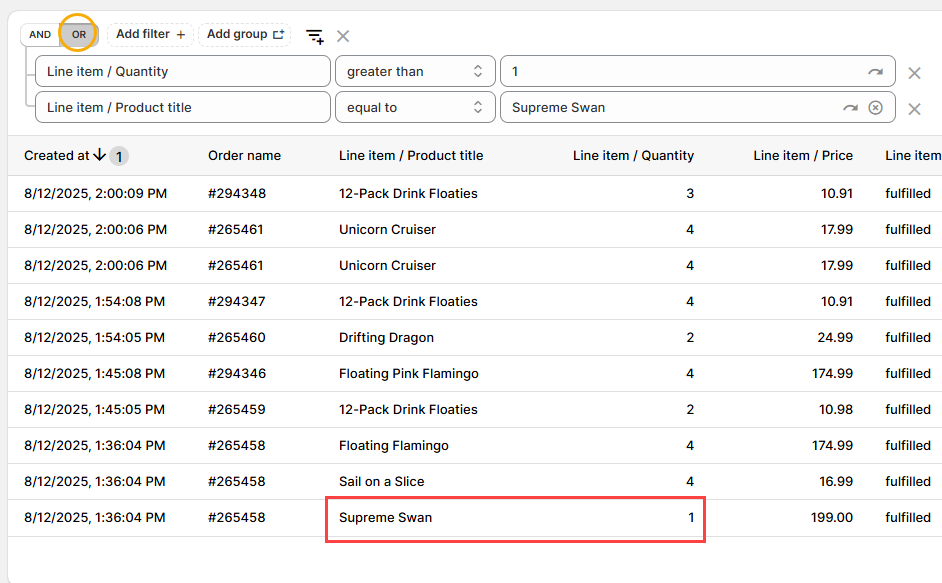
Step 3 - However, suppose I wanted to change this to be Orders that have either a Supreme Swan OR more than one of any given item.
Here I would go to the top, and where it says AND, I would click to change it to OR.
(click image to enlarge)
Notice now that the report shows only orders that have multiple quantities of any given line item OR a Supreme Swan.
Removing a Filter
Let's say I'm not happy with a filter, or simply want to remove it to try something different.
Deleting a filter is a relatively easy step - all you need to do is hit the 'X' button next to a filter line to remove it from the Report.
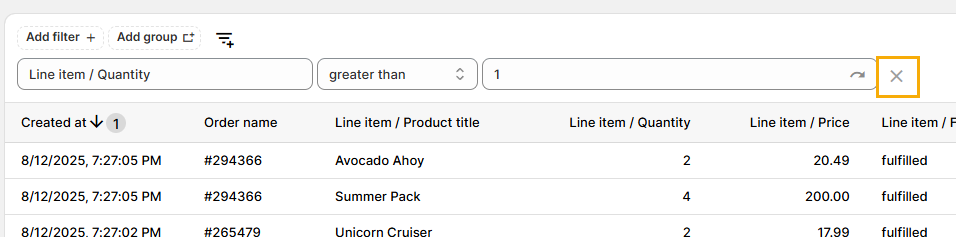
(click image to enlarge)
And that's it.
Filter Groups
Now let's say I'm looking to really create some advanced filters that involve groups of conditions together.
For example, maybe I want a report that shows only orders involving multiple quantities of an item AND the item must be either the Supreme Swan OR the Avocado Ahoy.
For this, we'll use a filter group to organize our filters.
This is much easier to understand with an example.
Step 1 - Click the 'Add group' button to add a filter group.
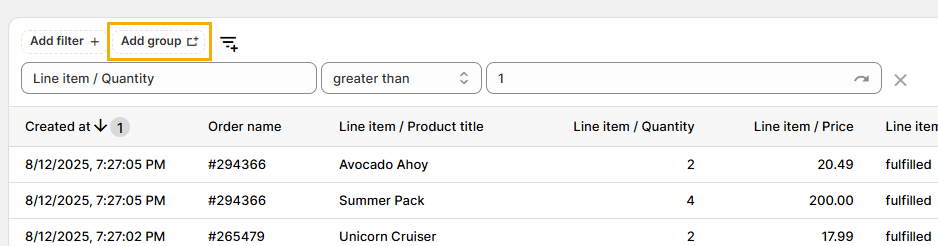
(click image to enlarge)
Step 2 - Once again, make sure it says AND at the top.
Then in the group, we can add the Line Item Product Title equal to Unicorn Cruiser, like so:
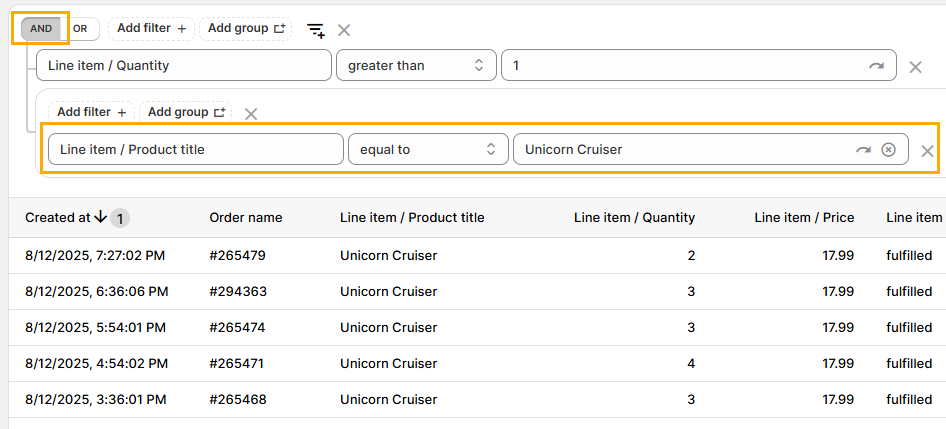
(click image to enlarge)
Step 3 - Now we can add our second filter. Here we need to be sure to include it within the group so that it goes alongside our existing product title filter.
So click 'Add filter' in the Filter Group, choose 'Line item / Product title', 'equal to' and 'Avocado Ahoy'.
The end result should look like this:
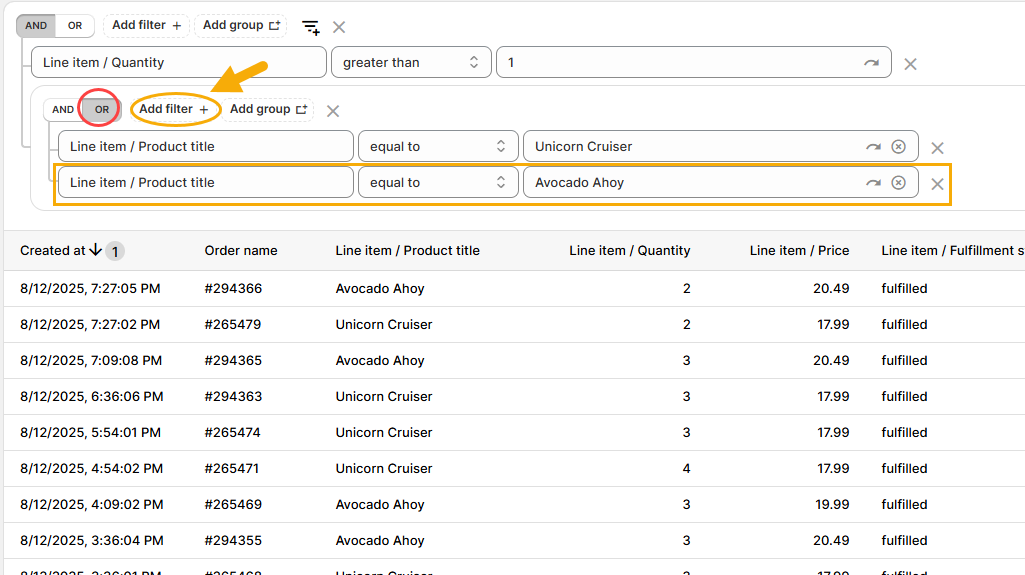
(click image to enlarge)
In other words, this gives us a filter that says
"Show me any orders that have more than one line item AND the product is either the Unicorn Cruiser OR the Avocado Ahoy".
Saving Filters
Once you're happy with a Filter, you can save it for future use.
This is ideal so that you don't have to create a fresh filter every time, particularly if you are using the same/similar filters across multiple reports.
Step 1 - Click the Save Filter button at the top.
You can then give your filter a name - e.g. I could type in 'Promo Offer filter'
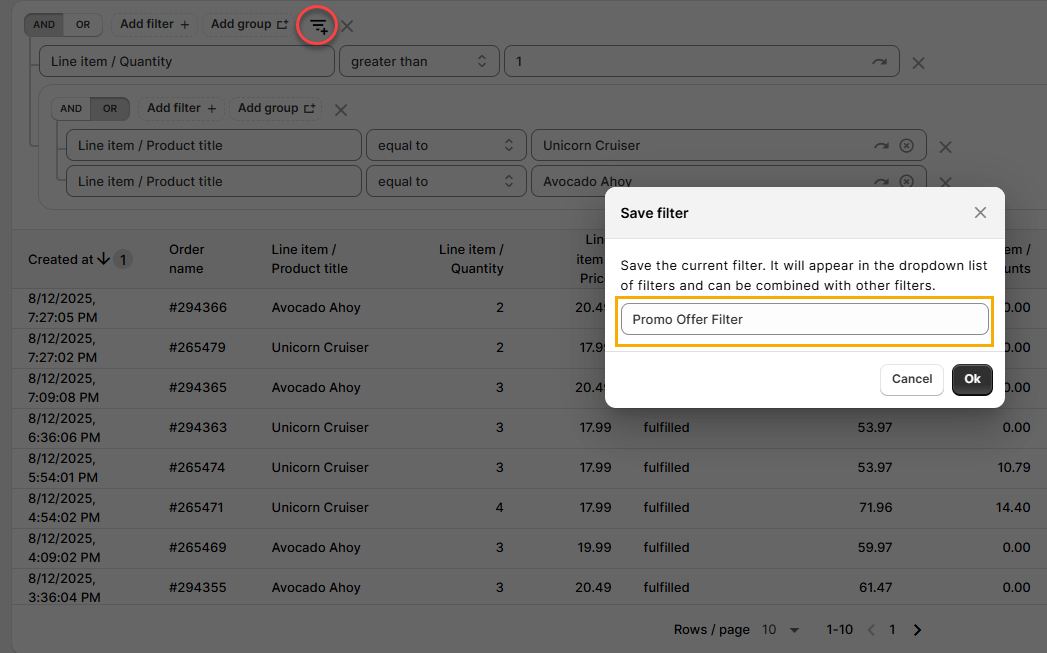
(click image to enlarge)
Step 2. Click Ok when you're done.
Note that this is a Line Item report, so this filter will now be available for use on any other Line Item reports (including this one, should you end up refreshing your browser or coming back to it at a later date).
You'll notice that next time you navigate to a report that can use this filter type, the filter is available from the dropdown like so.
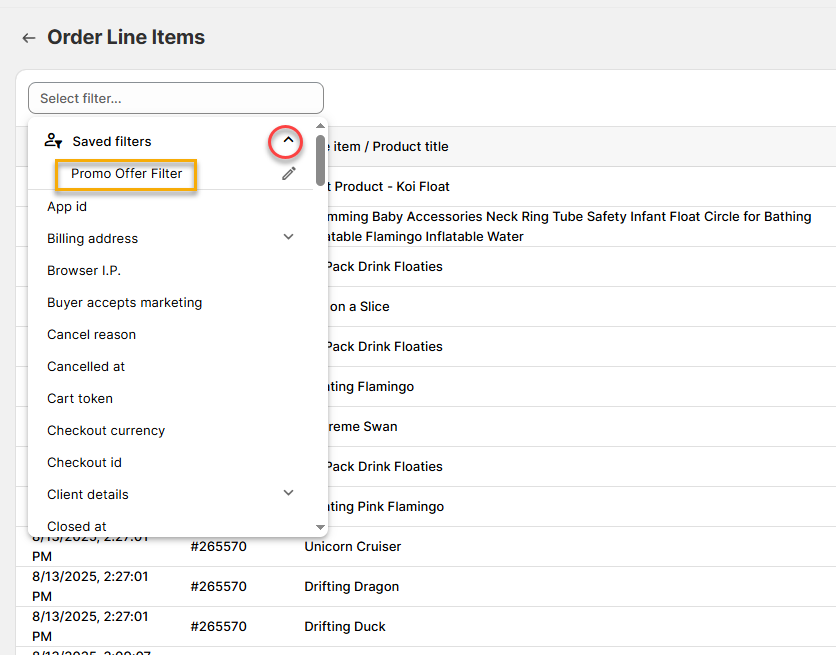
(click image to enlarge)
If I selected this filter, it would then work exactly the same as if I had created the filter from scratch.
For other articles in our Basic Guides series, check out our main section here.